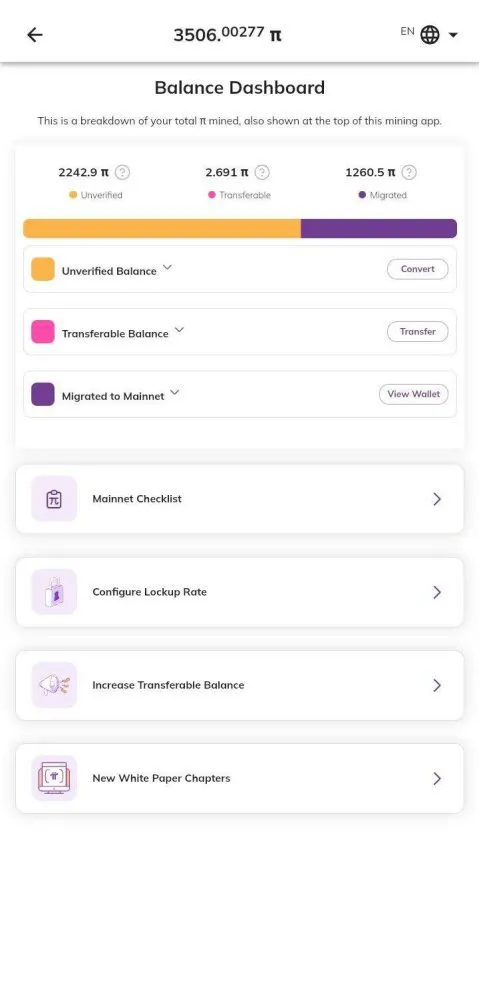
With Pi Network, users can mine cryptocurrency through a mobile app, offering a novel way to mine cryptocurrency. In order to fully participate in Pi Network’s decentralized economy, users must transfer Pi coins from the mobile app to the Mainnet. The guide will walk you through the entire process, explain key features, and provide personal insight into the pros and cons of moving Pi to Mainnet.
Key Takeaways:
- What is Pi Network Mainnet? The Mainnet is Pi Network’s fully decentralized blockchain where users can transact Pi coins outside the mobile mining app.
- Steps to Transfer Pi to Mainnet: This guide covers account verification, wallet setup, and the actual transfer process.
- Why Transfer Pi to Mainnet? Learn the benefits and potential risks involved in moving your Pi coins to Mainnet.
- Essential FAQs: Common questions about Pi coin transfers answered in detail.
Table of Contents:
- What is Pi Network’s Mainnet?
- Preparing for the Transfer: Key Requirements
- Step-by-Step Guide to Transferring Pi Coin to Mainnet
- Benefits and Risks of Transferring Pi to Mainnet
- FAQs: Common Questions About Transferring Pi Coins
- Conclusion
What is Pi Network’s Mainnet?
Pi Network’s Mainnet is the blockchain infrastructure that hosts all Pi transactions outside the mobile mining app. In simpler terms, it is the fully operational and decentralized version of Pi Network where Pi holders can store, transfer, and use their Pi coins as a legitimate cryptocurrency. Unlike the mining phase, which happens on a centralized system, the Mainnet operates on a peer-to-peer basis, allowing Pi to gain real-world utility.
Personal Insight: As an early participant in Pi Network, I’ve watched the network evolve from its inception. The launch of the Mainnet signifies Pi’s transition from a community-driven experiment to a decentralized economy. While the project is still young, transferring Pi coins to Mainnet is a significant milestone for users eager to engage with the ecosystem.
Preparing for the Transfer: Key Requirements
Before you can transfer your Pi coins to the Mainnet, you must meet several key requirements. These steps are crucial to ensure the security of your assets and to comply with Pi Network’s guidelines.
1. Identity Verification (KYC)
To prevent fraud and ensure fairness, Pi Network requires users to complete a Know Your Customer (KYC) process. This process involves verifying your identity by submitting a government-issued ID and other personal details.
Tip: Ensure that your KYC documents are clear and match the details provided during registration. A mismatch could delay or even prevent your Pi transfer to Mainnet.
2. Download and Set Up the Pi Wallet
To store your Pi coins on the Mainnet, you need the official Pi Wallet. You can download this from Pi Network’s official app or their website. Once installed, set up a secure password and back up your wallet passphrase. Losing this passphrase means losing access to your Pi coins.
Pro Tip: Store your wallet passphrase offline in a secure place, such as a password manager or a physical safe.
3. Sufficient Pi Balance
Before transferring Pi to the Mainnet, ensure that you have accumulated enough Pi coins during the mining phase. Keep in mind that there may be transaction fees associated with the transfer, which will be deducted from your balance.
Step-by-Step Guide to Transferring Pi Coin to Mainnet

Now that you’ve met the prerequisites, let’s dive into the actual process of transferring your Pi coins to Mainnet. Follow these steps carefully to ensure a successful transfer.
Step 1: Complete Your KYC Verification
- Open the Pi app and navigate to the “KYC” section.
- Submit your personal information and upload your government-issued ID.
- Wait for your KYC application to be reviewed. This can take a few days to a week, depending on the volume of requests.
Personal Insight: I recommend initiating your KYC verification early, as delays can occur during high-demand periods. My own verification took approximately five days due to a backlog, but the process was smooth once I submitted the required documents.
Step 2: Set Up Your Pi Wallet
- Download the Pi Wallet from the official Pi Network app or website.
- Create a new wallet by following the prompts and securely storing your passphrase.
- Verify your wallet is functioning by conducting a small test transaction within the Pi app, if available.
Step 3: Link Your Wallet to the Pi Network
- Once your Pi Wallet is ready, go back to the Pi app.
- Navigate to the “Mainnet” section and click on “Link Wallet.”
- Enter your wallet’s public key (a string of characters) to connect it to your Pi account.
Step 4: Initiate the Transfer to Mainnet

- After linking your wallet, go to the “Transfer Pi” option in the app.
- Enter the number of Pi coins you wish to transfer.
- Confirm the transaction and ensure you have enough balance to cover transaction fees.
- Once confirmed, the Pi coins will be transferred to your wallet on the Mainnet.
Step 5: Check the Transaction Status
- Transactions on the Pi Mainnet may take a few minutes to an hour, depending on network activity.
- You can monitor the status by checking your wallet or the “Mainnet” section in the Pi app.
Benefits and Risks of Transferring Pi to Mainnet
Benefits:
- Full Ownership: Once on the Mainnet, your Pi coins are fully decentralized, giving you complete ownership and control.
- Real-World Utility: Pi coins can be used for transactions, payments, and other decentralized finance (DeFi) applications on the Mainnet.
- Future Value Potential: As Pi Network continues to develop, transferring Pi to Mainnet ensures you’re positioned to take advantage of any price appreciation.
Risks:
- Price Volatility: Cryptocurrencies are notoriously volatile, and Pi is no exception. The value of Pi coins may fluctuate after the Mainnet launch.
- Transaction Fees: While nominal, transaction fees may accumulate, especially for frequent users.
- Security Risks: If you lose your wallet’s passphrase, you may permanently lose access to your Pi coins.
Personal Experience: When I transferred my Pi to Mainnet, I was excited about the potential growth but cautious of the risks. It’s essential to keep your security tight—store your passphrase offline and ensure your wallet is well protected.
FAQs: Common Questions About Transferring Pi Coins
Q1: Do I have to transfer all my Pi coins to Mainnet?
A: No, you can transfer as many or as few Pi coins as you want. However, keep in mind that you’ll need to leave enough Pi in your wallet to cover transaction fees.
Q2: Can I reverse a Pi coin transfer to Mainnet?
A: No, blockchain transactions are irreversible. Once your Pi coins are on the Mainnet, they cannot be moved back to the mobile app.
Q3: Is it safe to store Pi coins on the Mainnet?
A: Yes, as long as you follow proper security protocols, such as safeguarding your wallet’s passphrase and using trusted wallets, your Pi coins should remain secure.
Q4: What happens if my KYC application is rejected?
A: If your KYC application is rejected, you will not be able to transfer Pi coins to the Mainnet. You can reapply for KYC by correcting any errors in your initial submission.
Conclusion
Pi coins being transferred to Mainnet is an important step in leveraging the full potential of Pi Network. Your Pi coins will be ready for decentralized applications and future growth once you complete KYC verification, set up a secure wallet, and initiate the transfer.
As Pi Network continues to evolve, moving your coins to Mainnet allows you to take advantage of its full capabilities. Mainnet offers enhanced security, ownership, and real-world applications. Be vigilant about security and follow the proper steps.
You can confidently transfer your Pi coins to the Mainnet by following this comprehensive guide.
Leave a Reply